How to Turn Digital Designs Into Physical Products With Print on Demand
Turn digital designs into physical products by preparing high-resolution artwork, choosing a print-on-demand platform, selecting products like t-shirts or mugs, uploading your designs, and ordering samples to check print quality before selling.


You’ve got a folder full of great designs. Maybe it’s a bold illustration, a clever typographic joke, or a logo you’ve refined a dozen times. The problem? Getting those files off your screen and onto a shirt, mug, or poster used to mean sourcing a manufacturer, ordering hundreds of units, and gambling that someone would actually buy them.
That old model is dead. Today you can turn digital designs into physical products with no inventory, no minimum orders, and almost no upfront cost thanks to print on demand (POD).
The demand backing this shift is real: according to Grand View Research, the global print-on-demand market was valued at USD 10.8 billion in 2025 and is estimated at USD 13.1 billion for 2026.
This guide walks you through the complete, beginner-friendly workflow: from preparing your files to picking the right platform and selling your first product.
What Are the Main Methods for Creating Physical Products?
Before you upload anything, you need to pick the right production path. The best method depends on three things: your file type, your budget, and how hands-on you want to be. On-demand manufacturing has made most of these options accessible to solo creators, but they aren’t interchangeable.
Here’s a simple Design-to-Method framework to guide your decision:
- If you have a 2D graphic (an illustration, logo, or photo) → use Print on Demand for custom merchandise printing on shirts, mugs, totes, and posters.
- If you have a 3D model (a figurine, phone stand, or jewelry piece created in software like Blender or Fusion 360) → use a 3D printing service.
- If you want full hands-on control and small batches → use a local printer or DIY tools like Cricut or sublimation.
A quick comparison of the three main routes:
| Method | Cost per item | Speed | Quality control |
| Print on Demand | Low (no minimums) | Fast (made on order) | Platform-dependent |
| 3D Printing Service | Medium–high | Slower | High precision |
| Local Printer | Higher per unit | Fast turnaround | You can inspect in person |
Unlike sourcing large inventory runs overseas via platforms like Alibaba, these methods keep initial risk low. Don’t overlook DIY methods, either. A Cricut cutting machine or home sublimation setup lets you produce one-off items at home to test designs before scaling.
Do You Use Print on Demand or a 3D Printing Service?
The difference is fundamental. POD applies a 2D design onto an existing product, where your artwork goes on a blank T-shirt or ceramic mug that the printer stocks. 3D printing builds a brand-new object from scratch using a 3D model file, such as a custom phone stand or miniature figure.
If you choose the 3D route, verify your vendor’s current operational status. Shapeways, previously a major provider, ceased operations and filed for bankruptcy, as reported by TCT Magazine. Active alternatives like Sculpteo remain reliable choices for 3D manufacturing orders.
What Are the Pros and Cons of Using a Local Printer?
A local print shop offers a high-touch experience. You can inspect garment samples and approve a proof in person, ensuring strict quality control. However, the trade-offs include:
- Pros: direct quality checks, fast local pickup, and hands-on proofing.
- Cons: minimum order quantities, higher upfront costs, and potential inventory storage needs.
For most beginners, print on demand minimizes financial risk, though local printers remain useful for specific regional events.
How Should You Prepare Your Design Files for Printing?
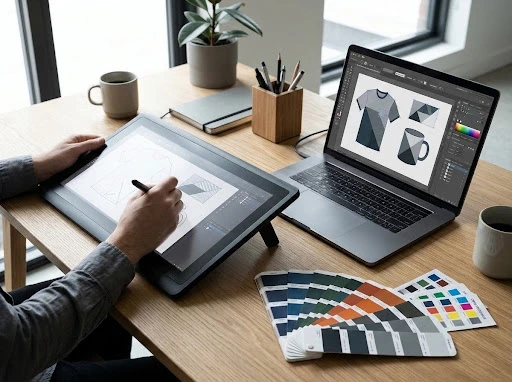
Getting your design files for print on demand correct prevents blurry or color-shifted physical goods. Treat file preparation as an essential step before putting your digital art on products.
Two concepts matter most: resolution and color mode.
Resolution (DPI/PPI). Screen displays look sharp at 72 DPI, but physical printing requires greater detail. The industry standard is 300 DPI at the full intended print dimensions. Always design at the final output size using graphic design software like Adobe Illustrator, Photoshop, or Canva.
CMYK vs. RGB. Digital screens display color using RGB (red, green, blue). Printers mix ink using CMYK (cyan, magenta, yellow, black). Vivid neon colors on a monitor can print duller because CMYK has a smaller color gamut. Design in or convert files to CMYK prior to exporting.
| Quick Tip: Preview your design in CMYK mode in your graphics editor before uploading. Adjust any muted tones prior to production to avoid surprises. |
What Are the Key File Formats You Need to Know?
Print files generally divide into three main categories:
- Raster files (PNG, JPEG): Built from pixels, making them suitable for photos and detailed artwork. PNG is preferred for POD because it supports transparent backgrounds.
- Vector files (SVG, AI, EPS): Built from mathematical paths, allowing infinite scaling without pixelation. Vector formats are ideal for logos and simple graphics.
- 3D files (STL, OBJ): Standard geometric files used by 3D printing services.
Use vector for typography and simple line art, and high-resolution raster (PNG) for detailed paintings or photographs.
How Do You Avoid Common First-Timer Mistakes?
Three common mistakes affect beginner print files:
- Uploading low-resolution images. Always set your canvas to 300 DPI at full print size rather than stretching web-sized images.
- Ignoring the safe print area. Keep key elements within the printer template boundaries so critical details avoid getting trimmed.
- Exporting in RGB. Preview and export your artwork in CMYK to match real-world ink output.
How Do You Turn Digital Designs Into Physical Products Step-by-Step?
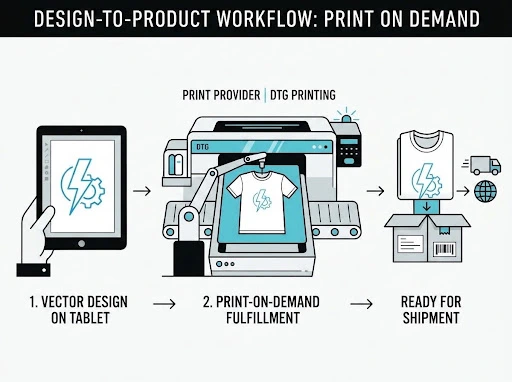
Following a standard design-to-product workflow across major print-on-demand platforms ensures consistent production quality. Here is how to use print-on-demand from setup to completion:
- Choose a POD platform. Select a provider that connects with your target marketplace.
- Select a product. Choose a base item, such as a shirt, mug, poster, or tote bag.
- Upload your design. Insert your high-resolution PNG or vector file into the print area.
- Create a mockup. Generate visual previews for your store listing.
- Order a sample. Purchase a test item to inspect physical quality before listing it for sale.
Comparing two leading fulfillment services:
| Platform | Model | Best for |
| Printify | Marketplace of independent print providers | Flexible supplier choices, wide item selection |
| Printful | In-house integrated production | Uniform production standards |

Printify operates as a marketplace connecting stores to third-party print vendors, offering a broad catalog, whereas Printful manufactures items in-house for structural consistency. In late 2024, the two companies merged to form FYUL while continuing to operate their respective platforms.
How Do You Use a Mockup Generator?
A mockup generator maps your artwork onto realistic product images, displaying how a shirt looks on a model or how artwork looks framed on a wall. High-quality mockups serve as essential marketing visuals for your online catalog.
What Should You Look For in a Quality Control Checklist?
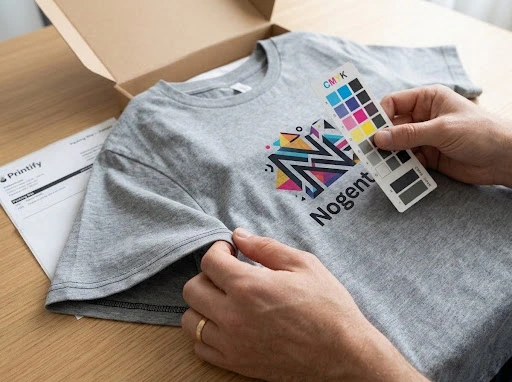
When your physical sample arrives, evaluate it against this quality control checklist before publishing the item to your store:
- Color Accuracy: Compare print colors against your physical CMYK proof.
- Print Durability: Stretch or wash fabric items to confirm ink adherence without cracking.
- Alignment & Centering: Ensure graphics sit level and match template coordinates.
- Material Quality: Verify garment weight, fabric softness, or mug ceramic weight meets expectations.
How Do You Choose the Right Products and E-commerce Platforms?
Matching graphics to appropriate products improves sales conversions. Consider these print on demand product ideas:
- Detailed illustrations or photos → posters, canvas prints, and wall art.
- Logos or compact graphics → hats, embroidered caps, and phone cases.
- Bold typography → custom t-shirt printing, hoodies, and tote bags.
Connecting your production partner to a sales channel forms the foundation of starting a print on demand store. Shopify hosts 62.8% of all POD and dropshipping stores. Platforms like Etsy offer established marketplace traffic for indie creators. Both platforms integrate directly with POD fulfillment services to sell custom products online automatically.
How Do You Scale Beyond One-Off Orders?
While a single t-shirt order is simple, scaling up to sell at events or to a larger audience requires finding services that handle bulk t-shirt printing without compromising quality or speed. Platforms like Printify are built to manage this transition seamlessly, allowing creators to shift from single-item fulfillment to larger order volumes as customer demand rises.
Market projections highlight strong long-term momentum. According to Straits Research, the print on demand market is projected to reach USD 84.70 billion by 2034, growing at a CAGR of 24.53% during the forecast period.
Bringing Your Designs to Life
To turn digital designs into physical products, focus on execution fundamentals: prepare 300 DPI CMYK files, select suitable base products, utilize fulfillment platforms effectively, and order physical samples to verify print quality. By combining prepared graphics with modern print on demand infrastructure, you can transition digital artwork into physical inventory without managing manual fulfillment.
What People Also Wanna Know More About Turning Designs Into Products
Can You Make a Living with a Print on Demand Business?
Yes. Creators can build a profitable print on demand business through focused design creation, product selection, and marketing. Because fulfillment fees occur after a customer completes a purchase, financial overhead remains low while testing new product concepts.
Do You Need to Register a Business to Use Print on Demand?
No, not immediately. You can start testing products as a sole proprietor. As your order volume increases, consult local legal and tax regulations regarding formal business registration and sales tax compliance.
Who Owns the Design When You Use a POD Service?
You do. Creators maintain full ownership and intellectual property rights when they create physical products from digital art. POD vendors act exclusively as manufacturing partners and claim no rights over uploaded assets.