
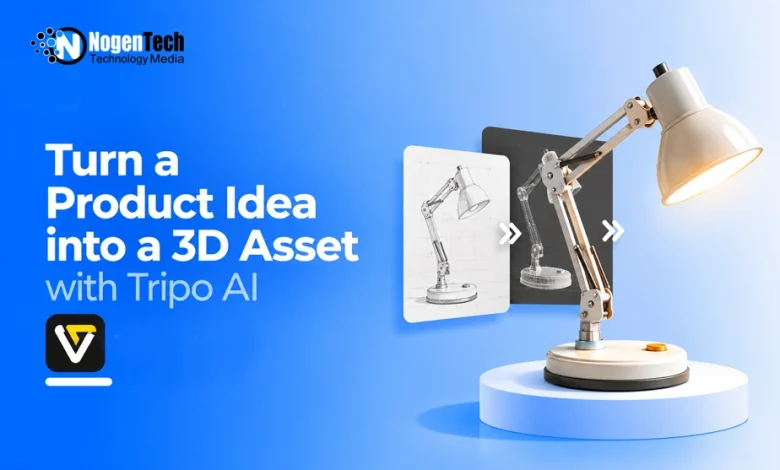
Turning a product idea into a 3D asset traditionally involves concept development, modeling, materials, topology, and export preparation. For small teams and independent creators, this can make early experimentation slow and expensive.
With Tripo Studio’s AI 3D Model Generator, creators can generate a 3D model directly from a text description or an image reference.
To make the workflow easier to follow, a fictional, unbranded modular desk lamp has been used as an example below. The same approach can be applied to furniture, consumer electronics, packaging, collectibles, game props, and other product concepts.
Step 1: Choose a Text or Image Input
Tripo’s Model workspace provides two direct ways to begin.
Text to Model is useful when the idea is still open, and the creator wants to explore different forms, colors, or materials. A short, structured prompt is usually more useful than a long list of complicated details.
For the fictional desk lamp, use a prompt such as:
| An original unbranded modular desk lamp with a rounded base, a simple adjustable arm, and a geometric lampshade. Matte off-white body, light-gray metal joints, teal accent panels, and small warm-orange control details. Clean connected structure, modern product design, no logo, no text, no watermark, no transparent parts, no floating components, and no extra objects. |
The prompt defines the object, structure, materials, colors, and restrictions without trying to control every detail.
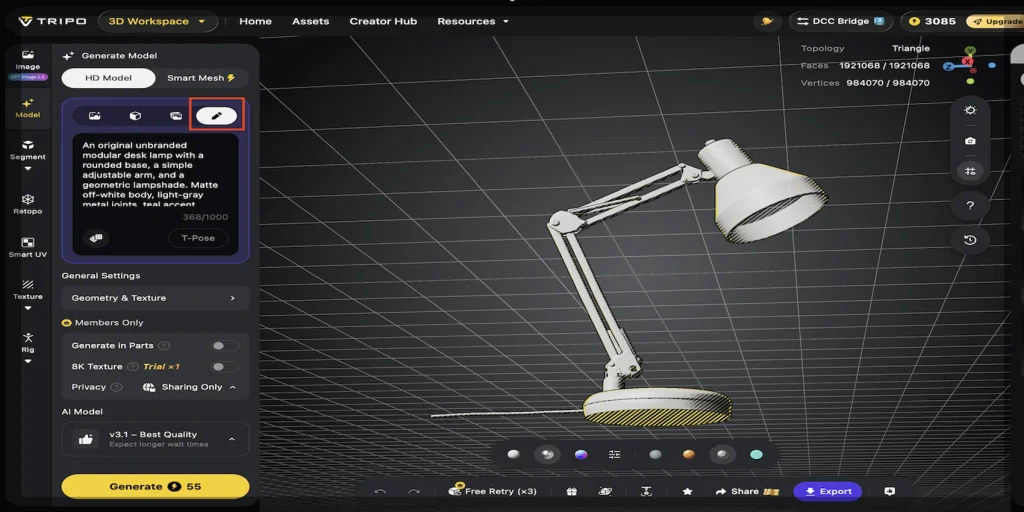
Image to Model is better when the creator already has a product image, sketch, concept illustration, or reference created with another tool. The image provides information about the object’s silhouette, colors, and visible structure.
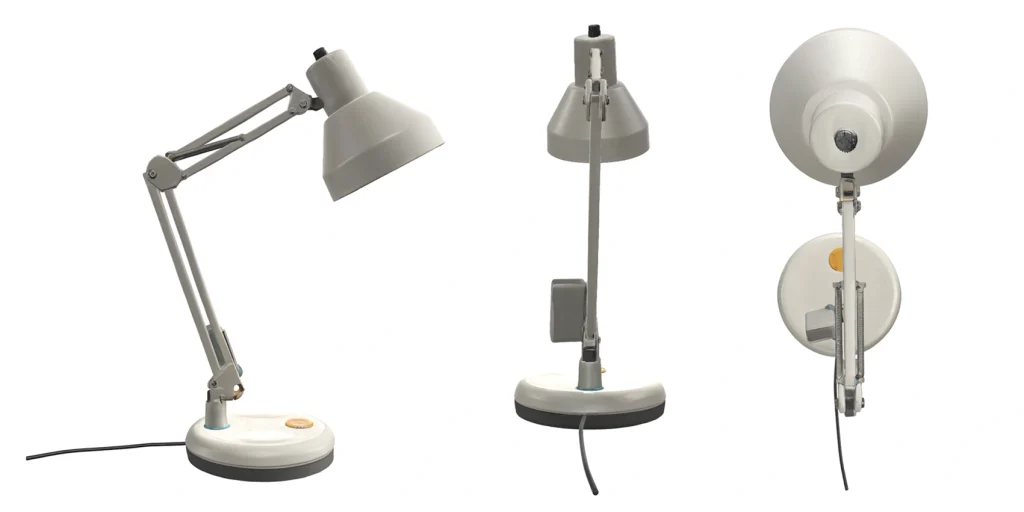
For this example, upload a fictional desk lamp reference image directly to the Model workspace.
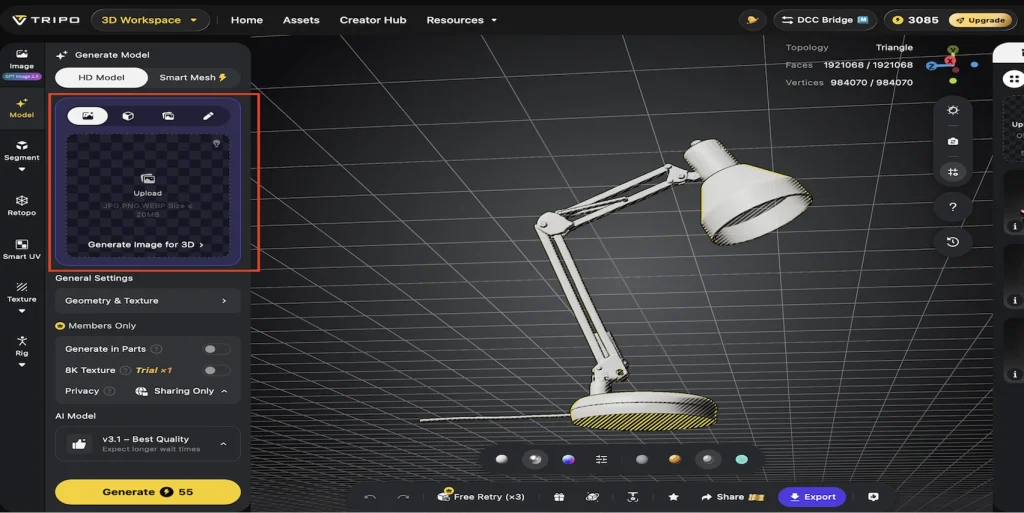
Image credit: Tripo Studio
Tripo also has a separate Generate Image module for users who want to create a reference image first. That is an optional creative path, not a required step, because the Model workspace already accepts text and image inputs directly.
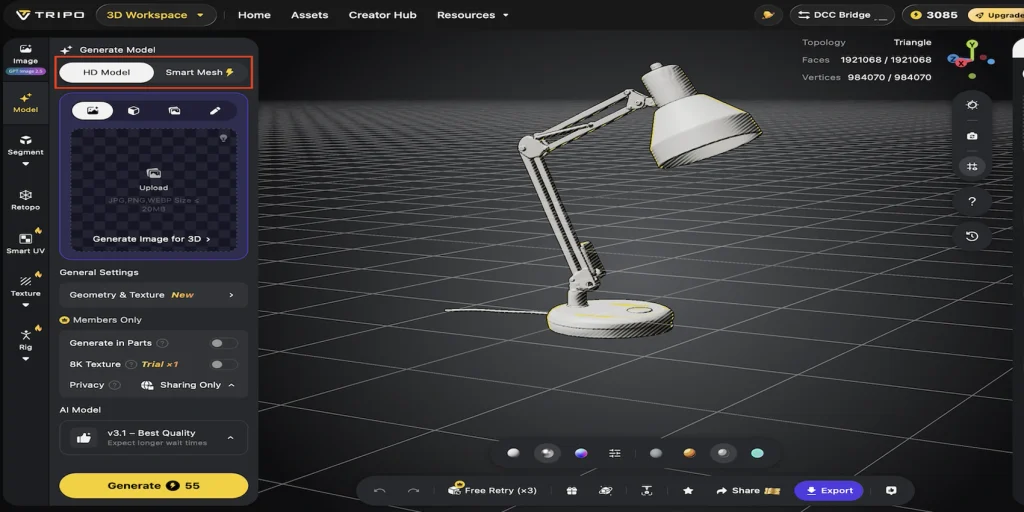
Step 2: Select the Generation Type
Choose the model type according to the intended result.
- HD Model is designed for higher-detail output. It generally takes longer and is suitable for product presentations, design reviews, visual development, and other situations where surface quality matters.
- Smart Mesh is designed for faster generation and lighter assets. It is more suitable for game props, real-time scenes, Web 3D models, AR, and quick concept testing.
For a detailed desk lamp presentation, HD Model is a reasonable choice. If the same asset is intended for a lightweight web viewer or an early interactive prototype, Smart Mesh may be more practical.
Other settings may include texture generation, topology, part-by-part generation, privacy, and the AI model version. These should be selected according to the final destination instead of treated as a fixed recipe.
Step 3: Review the Generated Model
A single image cannot show every side of an object, while a text prompt does not define every hidden surface. After generation, rotate the model and inspect it from the front, side, rear, top, and bottom.
Check whether the overall silhouette remains consistent, the main parts connect naturally, and the model contains unexpected holes, stretched surfaces, missing geometry, or fused components.
Compare the result with the original text or image reference to confirm that the main proportions, colors, and material boundaries remain recognizable.
For the desk lamp, this means checking the relationship between the base, arm, shade, and joints. The same review method applies to a chair, speaker, appliance, package, or game prop.
A rough concept may only need a visual review. An asset for ecommerce, AR, games, animation, or manufacturing requires closer checks of scale, topology, textures, and compatibility.
If the first result has a major structural problem, generating another version may be more efficient than repairing every part manually. AI generation can produce different results from the same input, so comparing several versions is often useful.
Step 4: Improve the Appearance When Needed
Not every model needs additional editing. If the shape and surface are already suitable, the creator can move directly to export.
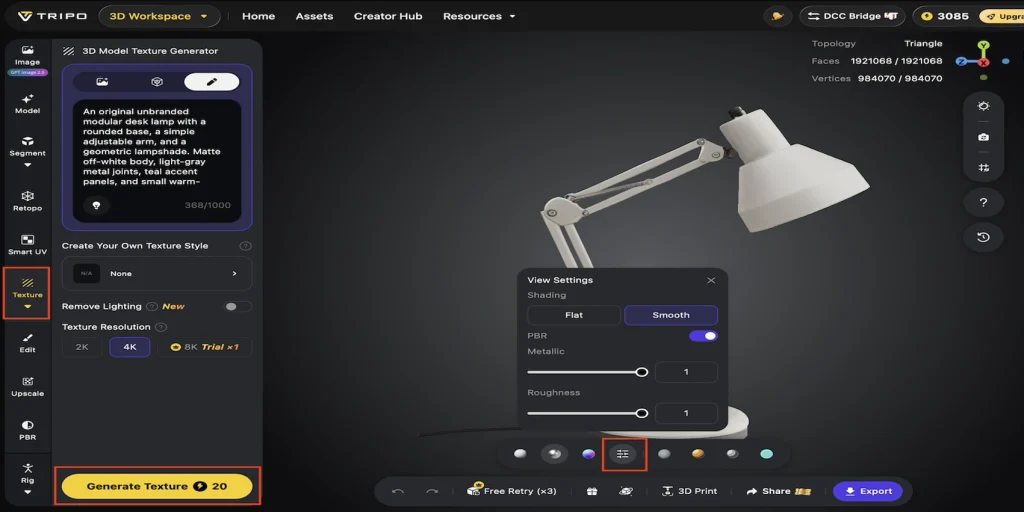
When the appearance needs improvement, texture tools can help define differences between materials such as painted plastic, metal, glass, wood, or fabric. PBR options can make materials respond more naturally to lighting, which is useful for product presentations and design reviews.
These adjustments should remain purpose-driven. A marketing preview may need stronger material contrast, while an early concept may only require a recognizable shape. Segmentation or retopology should be introduced only when the final use requires them.
Step 5: Prepare the Asset for Its Final Use
The same model may require different preparation depending on its destination.
For ecommerce and marketing, prioritize a clear silhouette, stable materials, and a reasonable file size. For Web 3D and AR, loading speed, compatibility, and real-time performance may matter more than very fine surface detail.
For games and interactive projects, Smart Mesh or topology optimization may be useful. For 3D printing, check open surfaces, thin sections, scale, and printability. A generated model should not be assumed to be ready for manufacturing without technical review.
Step 6: Export and Test the Asset
Tripo supports formats including USD, FBX, OBJ, STL, 3MF, and GLB. The best choice depends on the next application. GLB, the binary form of the glTF standard, is useful for efficient delivery of 3D assets, while FBX is common in animation and game workflows, and STL or 3MF may be used for printing-related tasks.
After exporting, open the file in its intended destination. Check the model’s scale, orientation, materials, textures, polygon count, and general performance. A model that looks correct in the generation workspace may behave differently after export.
Final Opinion: Turning Product Ideas Into 3D Models Doesn’t Have to Be Complicated
The workflow can be summarized as:
Text to 3D or Image to 3D → HD Model or Smart Mesh → Review → Optional Appearance Refinement → Export and Test
The fictional desk lamp makes the process concrete, but the method is not limited to lamps. By starting with either a clear description or a useful image reference, creators can move from an early product idea to a reviewable 3D asset with less manual work and more room for experimentation.
The generated result should be treated as an editable draft, especially when exact dimensions or manufacturing quality are required.