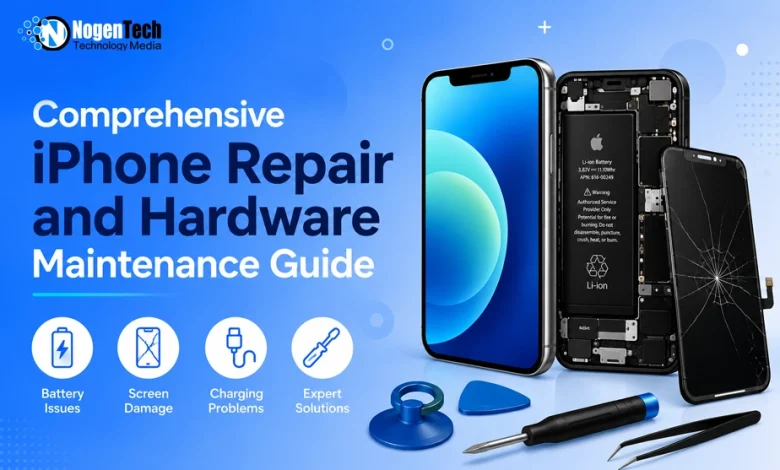
Your iPhone can develop hardware problems after years of daily use. A cracked screen, weak battery, or blocked charging port can affect your routine.
This guide explains common iPhone hardware problems. It also covers iPhone screen replacement, iPhone back glass replacement, basic diagnostics, and safe repair practices.
Common iPhone Hardware Problems
Battery Problems
Your iPhone battery loses capacity as it ages. The Battery Health section in iOS can show its current condition.
You may notice several signs of battery wear:
- The battery drains fast after light use.
- The phone shuts down without warning.
- The device becomes hot during normal use.
- Performance drops during heavy tasks.
- The screen lifts from the frame due to battery swelling.
A worn battery may need replacement. A new battery can restore better power performance.
Display Damage
A hard drop can crack the glass or damage the display panel. A broken screen can also affect touch response.
You may notice:
- Dead touch areas.
- Random touch input.
- Black spots on the display.
- Flickering lines.
- Wrong colors.
- No image on the screen.
A small crack may not stop normal use at first. Deep cracks can expose internal parts to dust and moisture.
You can explore suitable parts and tools through this iPhone screen replacement collection.
Charging Port Problems
Dirt and lint can collect inside the charging port.
You may notice that:
- The cable feels loose.
- Charging stops after slight cable movement.
- The phone charges only at certain angles.
- The iPhone fails to detect the cable.
- Charging starts and stops without warning.
Check the port before you replace any hardware. A simple cleaning process can solve some charging problems.
Essential Tools for iPhone Repairs
The right tools make iPhone repairs much safer. The wrong screwdriver can damage tiny screw heads. A metal tool can also damage sensitive internal parts.
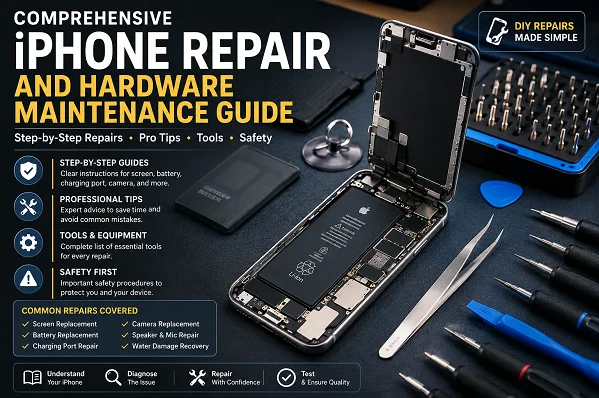
A basic repair setup should include:
- Plastic opening picks.
- A nylon spudger.
- Suction equipment.
- Fine tweezers.
- A controlled heat source.
- A magnetic screw mat.
- A bright inspection light.
Keep your tools clean and in their place.
Precision Screwdrivers
iPhones use very small screws. Some models have pentalobe screws near the charging port. Internal parts can use other small screw types. Turn it slowly and avoid extra force.
Place each screw in a marked section of your magnetic mat. Screw size can vary across the device.
Plastic Opening Tools
Plastic tools offer safer leverage during a repair. A plastic pick can help you separate adhesive and clips. A nylon spudger can help you disconnect certain connectors. Use light pressure near cables and board components.
Never force a connector. A damaged flex cable can create a much larger repair problem.
Suction Cups and Heat
Strong adhesive can hold the display tightly against the frame. A suction cup can help you create a small gap.
Basic Diagnostic Checks
A quick diagnosis can help you identify the real problem. You should test the device before you buy a replacement part. You can compare the device’s condition before and after the repair.
Check Battery Health
Open the battery settings and check the battery health information. A low maximum capacity can indicate normal battery wear.
Look for rapid drain, sudden shutdowns, and unusual heat. Physical swelling requires immediate caution.
Test the Display
Test the full touch area before you open the phone. Swipe across every part of the screen. Check for:
- Dead touch zones.
- Ghost touches.
- Black spots.
- Flickering.
- Bright lines.
- Color issues.
A complete test helps you confirm the exact display problem.
Safe Charging Port Cleaning
A blocked port may not need a hardware repair. You can inspect and clean the port first.
Step 1: Turn Off the iPhone
Switch off the iPhone before you inspect the charging port. Keep the charging cable disconnected.
Step 2: Inspect the Port
Use a bright light to check the port. Look for lint, dust, and compact debris. Take your time. A small amount of packed lint can prevent a proper cable connection.
Step 3: Remove Debris Carefully
Use a suitable non-conductive plastic tool. Remove debris from the sides and rear area of the port.
Avoid the delicate center contacts.
Step 4: Test the Connection
Connect a compatible charging cable after you clean the port. The connector should fit firmly. A loose connection can point to port damage. A persistent fault may need professional inspection.
iPhone Screen Replacement Guide
An iPhone screen replacement needs patience and proper screw control.
Ready Your Workspace
Keep the backup on the iPhone before the repair. Save important photos, files, contacts, and other data. Turn off the device completely. Place the phone on a clean and flat surface.
A lower battery charge can reduce the risk during internal repair. Never work on a swollen or badly damaged battery.
Open the iPhone
Remove the bottom pentalobe screws if your model uses them. Apply controlled heat around the display edges. The heat can soften the factory adhesive.
Place a suction cup near the lower display area. Pull gently until you create a small gap. Insert a thin plastic pick into the gap. Slide the pick around the frame to release the adhesive.
Do not insert the pick too far. Internal cables can sit close to the frame edges.
Disconnect the Battery
Open the display carefully. Do not pull it away from the rear housing.
Disconnect the Display Cables
Remove the protective bracket if your model has one. Disconnect the display and touch connectors with care. Some models also have front sensor or earpiece connections attached to the display.
Keep each connector close to its original position. Avoid unnecessary contact with the exposed connector contacts. Remove the damaged display after you disconnect all required cables.
Install the New Screen
Compare the new screen with the original unit. Check the connectors, mounting points, sensors, and frame shape. Some models require small components from the original display. Follow a model-specific guide before you remove any part.
Connect the new display cables to the correct logic board sockets. Reconnect the battery connector after the display cables are in the correct position. Turn on the iPhone before you seal the display. Test the new screen first.
Test the Replacement Screen
Check the full touch area. Swipe across every section of the display.
Test the following functions:
- Touch response.
- Brightness.
- Color accuracy.
- Front camera.
- Earpiece speaker.
- Proximity sensor.
- Face ID on supported models.
- Auto-brightness.
A complete test can reveal a faulty replacement part before final assembly.
Seal the New Screen
Turn off the iPhone after the test. Clean old adhesive from the frame. Use compatible replacement adhesive. Place it around the frame without covering important internal areas.
Position the display carefully. Press around the edges with even pressure. Replace the protective brackets and screws. Use each screw in its original position.
Avoid excessive pressure. Small screws can damage internal parts if they sit in the wrong location.
iPhone Back Glass Replacement Guide
A cracked rear panel can affect the look and protection of your iPhone. An iPhone back glass replacement can restore the rear surface when the original glass has severe damage.
Back glass repair can prove more difficult than a screen repair. Strong adhesive can hold the rear glass in place. Some iPhone models also contain sensitive components close to the rear panel.
You can find suitable parts and tools in this iPhone back glass replacement collection.
Inspect the Rear Panel
Check the full back surface before you start. Look for cracks, loose glass, and exposed areas. Protect your hands from sharp glass. Use suitable protective equipment during the repair.
Check the camera area as well. Cracks near the camera can affect the lens or camera housing.
Remove Damaged Back Glass
Back glass removal can require specialized equipment. The exact method depends on the iPhone model. Use only tools that suit your device. Apply controlled heat when the repair method requires it.
Never apply excessive heat near the battery or camera system. Avoid force near internal components. A professional repair service may offer a safer option if the rear glass has severe damage or the phone has complex internal construction.
Install New Back Glass
Clean the frame after you remove the damaged glass. Remove old adhesive and loose fragments with care. Check the new glass before you apply adhesive.
Press the panel into place with even pressure. Allow the adhesive to set before you place heavy pressure on the phone.
Common DIY Repair Mistakes
- Using the wrong screwdriver.
- Mixing different screw sizes.
- Applying too much heat.
- Pulling the display too far.
- Using metal tools near sensitive parts.
- Pulling connectors with force.
- Skipping a data backup.
- Failing to test a new part.
- Reusing damaged adhesive.
- Ignoring battery swelling.
A slow and organized process can reduce many repair risks.
Test Your iPhone After Repair
Complete a full test after you finish the repair. Check charging performance and battery behavior. Test the entire display. Open the front and rear cameras.
Test the speakers and microphone. Check the buttons, Wi-Fi, Bluetooth, and cellular connection. Inspect the frame and display edges. The replacement screen or back glass should sit evenly inside the housing.
A final test can reveal a loose connector or faulty part before you return the phone to daily use.
When to Use Professional Repair Services
Home repair can work well for basic hardware problems. Complex faults need specialist equipment and technical skills. Contact a professional repair technician if your iPhone has:
- A severely swollen battery.
- Major motherboard damage.
- Liquid damage.
- Burn marks.
- Heavy internal corrosion.
- Face ID hardware faults.
- Broken board-level connectors.
- Severe camera or sensor damage.
A trained technician can use advanced tools to diagnose board-level problems.
Related Guides:
- How to Share a WiFi Password (iPhone, Android & Windows)
- Essential iPhone Privacy Settings & Tips for Better Security
Final Thoughts
A careful iPhone screen replacement can restore a damaged display and extend your device’s useful life. A suitable iPhone back glass replacement can also restore a cracked rear panel.
Good tools make both repairs easier. A clean workspace and correct repair method can also reduce the risk of extra damage. A careful repair process can turn many basic iPhone hardware problems into manageable home projects. Safety should remain your first priority during every repair.