How to Make A Stamp Online by Yourself

Seals and stamps verify documents and give them official status. Stamps are commonly used in official settings for the verification of different documents like invoices, payment receipts, offer letters and more.
But how can you make a stamp for your startup by yourself?
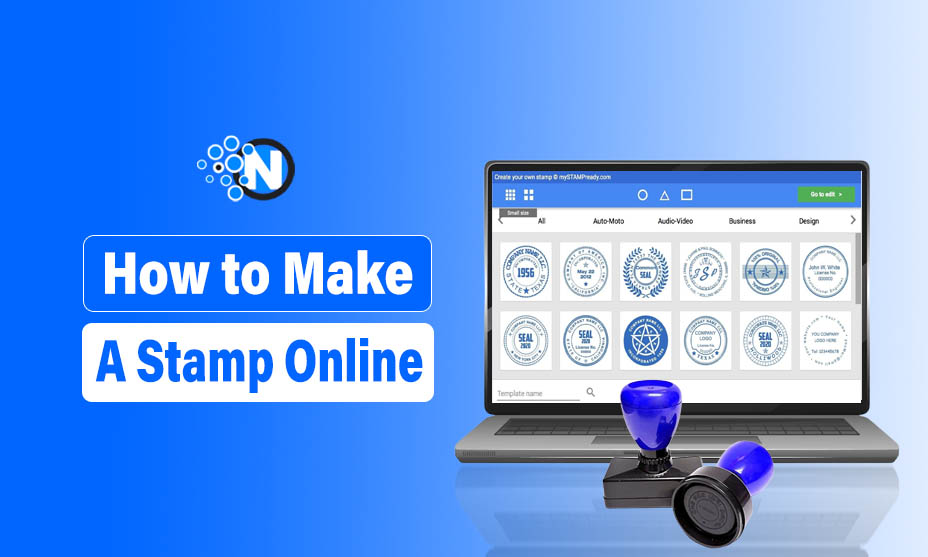
In the digital age, creating and obtaining these imprints online is possible. Online services like mystampready.com let anyone design and produce their own seal from home. Users can use the site’s graphic editors to draw and edit the seal’s layout, adding details. They can choose the size and shape and make changes using the designer’s functionality.
The finished file can be downloaded in various formats, ensuring it can be printed on any printer. Online custom stamp designers reduce the time and effort needed to create a professional result, offering convenience and autonomy to businesses and individuals seeking to create their own unique products.
In this article, you will find a complete guide on making a stamp yourself online.
Benefits Of Using An Online Designer
There are lots of advantages to using an online designer to create seals and stamps, especially in the document management industry. Online services let users create customized seals from the comfort of their home or office, saving time and money.
Another great thing about these online services is that you can browse through different types of editable seals and stamps to find the one that’s right for you. The designer has a bunch of templates that you can easily customize by adding photos, logos or signatures. It’s really handy because you can choose and add the right bits to the project page.
Expert commentary and instructions on how to use the designer are provided at every step, so you can rest assured that your data is safe and your privacy is respected throughout the process. The intuitive interface and helpful videos make learning the basics of print design and layout easy.
Just click the button and the editor will open up in front of you, where you can choose the line thickness, color and outline. But if you want to get creative and design something completely new, the designer has all the tools you need to make it happen from start to finish.
The cost of the service is really competitive, especially when you think about how much time you’ll save. You won’t need to spend hours looking for specialized services or learning complex software. All you need is a laptop or any other device with internet access, and you can place your own seal order or download a layout for later use.
Free Stamp and Seal Maker online
One of the best things about the MyStampReady service is that you can create seals for free without having to register. This is a big plus for entrepreneurs and commercial organizations that are short on time and like to get things done efficiently. All you have to do is choose a new template or upload a photo to create your seal design.
Here’s how you can make your own stamp in 2024:
When you’re working with an online designer, you don’t have to enter any personal data or go through lots of steps to verify who you are. All you have to do is click the ‘Create a stamp’ button and you’ll be offered a wide range of standard and stamped templates. If you want to create something unique, though, we suggest using the editing tools that let you tweak the outline, line thickness and color to get it just right.
It is easy to use, so it’s great for both experienced designers and people who are creating a stamp for the first time. The basic functions of the service are easy to use, and if you need help, you can always check out the instructions or video tutorials on the site.
Your documents and personal data are safe with us. We protect the information of our customers. Once you’ve created your print, you can save the layout in PNG or SVG format. This lets you print on any equipment or order a physical print directly through the service.
Step-by-Step Guide to Creating a Stamp
Step 1: Design Your Stamp
The first step is to decide what you want your stamp to look like. This could be anything from a simple shape to a more complex logo or design. If you’re not confident in your drawing skills, you can find free printable designs online or use graphic design software to create one.
Once you have your design, print it out or draw it on paper. Remember, the image will be mirrored when stamped, so any text should be drawn backward.
Step 2: Transfer the Design
To transfer your design onto the carving material, you can use a couple of methods:
- Tracing Method: Place your design face down on the carving material and rub the back with a pencil or pen to transfer the ink.
- Carbon Paper: Place carbon paper between your design and the carving material, then trace over the design.
Make sure the design is clear and easy to see on the material.
Step 3: Carve the Stamp
Now comes the carving. This step requires patience and precision:
- Outline First: Start by carving along the lines of your design to outline the main shapes.
- Remove Background: Carve away the areas outside the lines, leaving the design raised. Go slowly, and don’t apply too much pressure.
- Detailing: Once the main outline is done, you can add details or clean up edges.
Test your stamp periodically by pressing it onto paper to see how it looks and to make adjustments as needed.
Step 4: Mount the Stamp
Once you’re happy with the carving, it’s time to mount your stamp. This step is optional but can make your stamp easier to use. Simply glue your carved piece onto a wooden block or acrylic sheet. This gives you a handle and makes the stamping process smoother.
Step 5: Start Stamping!
With your stamp complete, you’re ready to start using it. Ink it up with a stamp pad and press it firmly onto your desired surface. You can use your stamp on paper, fabric, wood, or other materials depending on the ink you choose.
Tips and Tricks
- Practice Makes Perfect: If you’re new to carving, practice on a spare piece of material before starting on your final design.
- Use the Right Ink: Depending on your project, choose the appropriate ink. There are inks designed for paper, fabric, and other materials.
- Clean Your Stamp: After using your stamp, clean it gently with a damp cloth to prevent ink buildup.
Materials Needed
Before you begin, gather the following materials:
- Carving Material: You can use rubber blocks, erasers, or linoleum blocks.
- Carving Tools: Linoleum cutters or X-Acto knives work well.
- Stamp Pad: Choose a color that fits your design.
- Design Tools: Pencils, paper, and possibly a printer for transferring designs.
- Mounting Material: Wood blocks or acrylic blocks can be used to mount your stamp.
Options for Creating and Delivering a Custom Stamp
When choosing how to create and receive your custom stamp, consider the following:
- Production: After finalizing your design, select the stamp material, such as polymer, rubber, or metal, based on your needs.
- Delivery: Various delivery methods are available, including courier services and postal options within Russia.
- Electronic Delivery: Download the digital design for printing locally.
- Cost: Prices vary by material, size, and delivery method.
- Modifications and Cancellations: You can change or cancel your order before production starts, though fees may apply.
- Support: For any questions, contact customer support via email or phone.
Closing Thoughts
Making custom stamps is easier than ever before, even without hiring professional designers. You can use online tools to create and print stamps for business use. However, when it comes to making stamps online, choose a tool that offers features like easy to use designing interface, lots of editable templates, downloadable files and more.


