
Do you want to edit a photo to fix something that’s wrong with it or make alterations so that it looks better? Contrary to what you may think with the right software you don’t need to have any experience to start improving your photos.
In fact, if you want to start editing your photos you can do so almost immediately using Movavi Photo Editor. Its simple user interface and intuitive approach will make it easy to take full advantage of its features and apply them to your photos to make the changes you need.
How to Start Editing Photos With Movavi Photo Editor?
If you like to begin, you just need to launch Movavi Photo Editor and click on the ‘Browse for Images’ button then select the photo that you want to edit. Once it loaded into the editor, you can begin to edit your photo in many different ways:
-Enhance the quality of photos by opening up the ‘Adjust’ tab and tweaking the various color settings that are present. It is possible to fix issues such as blurry images or use Movavi Photo Editor’s ‘Magic Enhance’ feature to automatically improve the image quality as well.
-Retouch portraits or selfies by opening the ‘Retouching’ tab and using the tools that are there to remove blemishes, smooth wrinkles, get rid of shine, and more. If you want you could apply different types of digital makeup, or alter hair and eye colors.
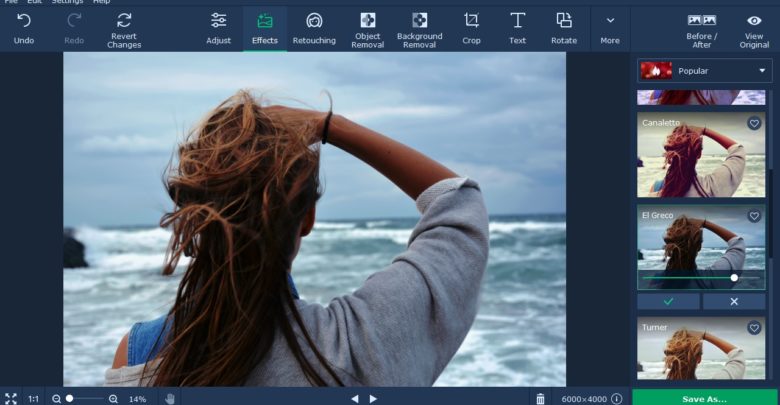
-Apply artistic filters under the ‘Effects’ tab by browsing through Movavi Photo Editor’s selection and choosing the appearance that you want for your photo.
-Remove unnecessary elements to improve the photo composition by heading to the ‘Object Removal’ tab. The tools there will help you to select the object you want to remove as precisely as possible and delete it without leaving imperfections behind.
-Transform the frame by cropping, rotating, flipping or resizing it using the tools under the ‘More’ tab. If the horizon isn’t level Movavi Photo Editor has a leveling tool that you can use to straighten it.
Additional Features
-Delete or replace the background using the tools provided in the ‘Change Background’ tab to select the background and remove it. Once removed the background can be left transparent, or replaced with a new image of your choosing.
-Insert captions by selecting one of the styles of text under the ‘Text’ tab and placing it on your photo. The text that you add is customizable fully according to your needs, and Movavi Photo Editor has stickers that you can add to accentuate it further.
Final Thoughts
These are the details about how to edit photos with the help of Movavi Photo Editor. As you can see, it doesn’t take any technical expertise in order to use the amazing editing features that are available and to be honest the best way to familiarize yourself with them is to try them out firsthand.
Be sure to experiment and use various features in conjunction with one another to see exactly how they can help to improve your photos.