How to Invert a Picture on iPhone 13? A Simple Guide
Learning how to invert a picture on iPhone 13 is not as complicated as it may seem. People often inverted pictures for many reasons, such as wanting to view a photo’s negative or It may be your shortage of understanding colors or you have ever taken a picture and then realized that it would look better if it were inverted. In this guide, we will show you how to invert a picture on your iPhone. It’s a simple process and can be done in just a few seconds. Keep reading for instructions on how to do it.
How to Invert Picture on iPhone Through Settings:
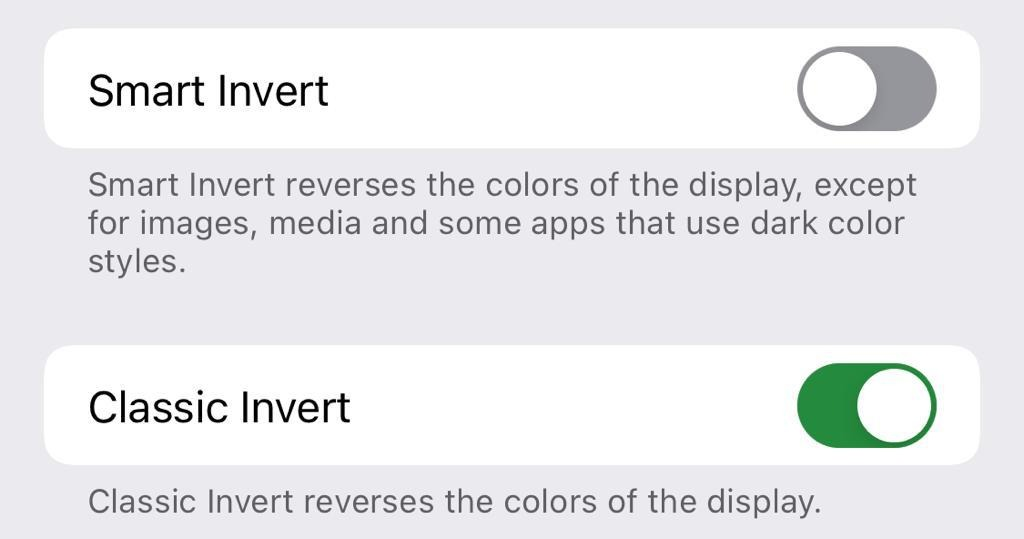
The iPhone 13 has an accessible function for inverting colors. There are two inverting features in the settings classic invert and smart invert.
Classic Invert: This inverts the colors of your display, including images and videos.
Smart Invert: This inverts most colors on your display except for media, images, and some apps that use dark color styles.
To turn on Classic Invert:
- Open the Settings app > Accessibility > Display and text size > Classic Invert.
- Tap Color Filters, then select Classic Invert.
If you want to invert the colors of your display but keep media, images, and some apps from being inverted, turn on Smart Invert.
Read More:
- How to Delete Contacts on iPhone – An Ultimate Guide
- How to Screen Record on iPhone 12- An Ultimate Guide
To turn on Smart Invert:
- Open the Settings app > Accessibility > Display and text size > Smart Invert .
- Tap Color Filters, then select Smart Invert.
How to Invert a Picture on iPhone in the Photos App:
The ability to instantly flip images in the photos app is among the new iOS 13 features. This is a fantastic feature for inverting photos. Users for their ease can utilize this feature for a specific image.
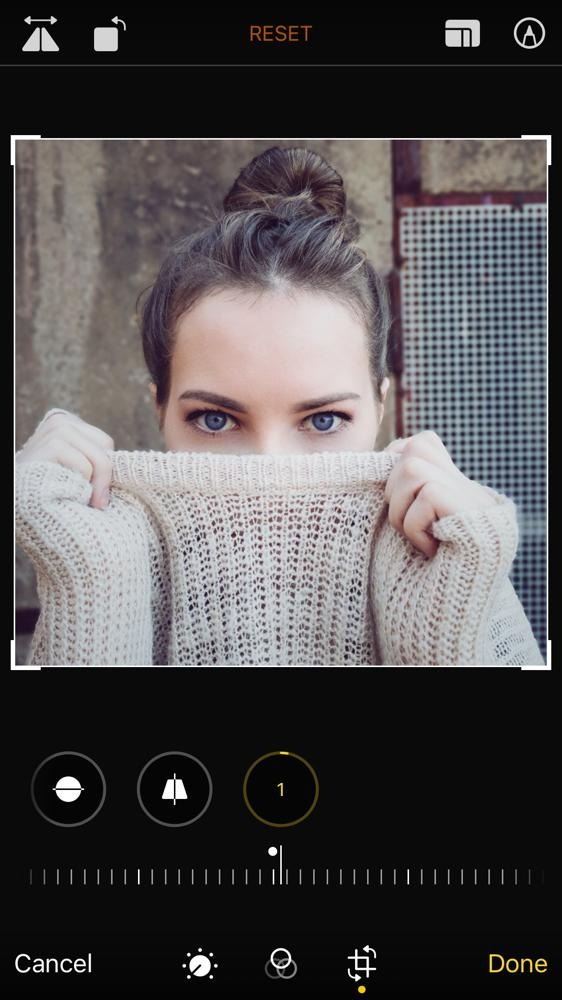
- Go to the Photos App
- Browse the image that needs to invert
- Select the image
- Click on the edit option
- To edit your photos, start by zooming out and selecting the editing options from the menu. Then, look for an icon that is a squared arrow with a circle around it and click on it. This will invert your image. Once inverting the image, click on the “Done” option in the upper right-hand corner
Read More:
- How to Screen Record on iPhone 12- An Ultimate Guide
- iPhone Photos Logo- Where to Download in PNG Format?
How to Invert a Picture on iPhone Using a Third Party App:
In the app store, there are multiple apps available that can be used to invert images on your iPhone. Some of these apps are free while others must be purchased. The above methods might not work with your iOS devices, so in such a situation you must prefer the use of any app from the App store. Here is the list of top inverting apps that you can download for an advanced experience of image inversion:
PhotoDirector:
PhotoDirector is an all-in-one photo editor and video editor. It offers a wide range of easy-to-use tools for editing photos and videos, making it a great choice for inverting images on your iPhone.
It is also easy to use especially while inverting images, using the color curves, and modifying the level and intensity for an individual look.
Negative Image:
Negative Image is a free app that offers a simple way to invert images on your iPhone. The app has a user-friendly interface and offers a number of features for image editing, including the ability to invert images. It’s easy to use and has a user-friendly interface.
PicsArt:
PicsArt is a free app that allows users to edit photos in a number of ways, including inverting image filters. Multiple kinds of filters are available in this app that you have to apply to your image. You have to export the image into Picsart and then apply the filter of your choice.
Adobe Photoshop Express:
Adobe Photoshop Express is a free app that can be used to invert images on your iPhone. This app is also great for other photo editing tasks such as cropping, resizing, and adding filters.
As you can see, there are a number of ways to invert images on the iPhone. Whether you want to use the built-in setting or download a third-party app, there is an option for you. Inverting images is a great way to change up the look of a photo, and it’s easy to do. Give it a try today.
How to Make Invert Picture Shortcut on iPhone:
You can do it through another way on iPhone 13 with Face ID, you can use the Accessibility Shortcut to invert the colors on your screen from the Lock screen. To do this, triple-click the Side button while your iPhone is locked. Then, follow the steps below to add Smart Invert Colors to the Accessibility Shortcut. After you’ve added it, triple-click the Side button again to invert the colors on your screen. To revert back to the standard display, triple-click the Side button again.
- Open the Settings app on iPhone.
- Tap on General.
- Scroll down and tap Accessibility.
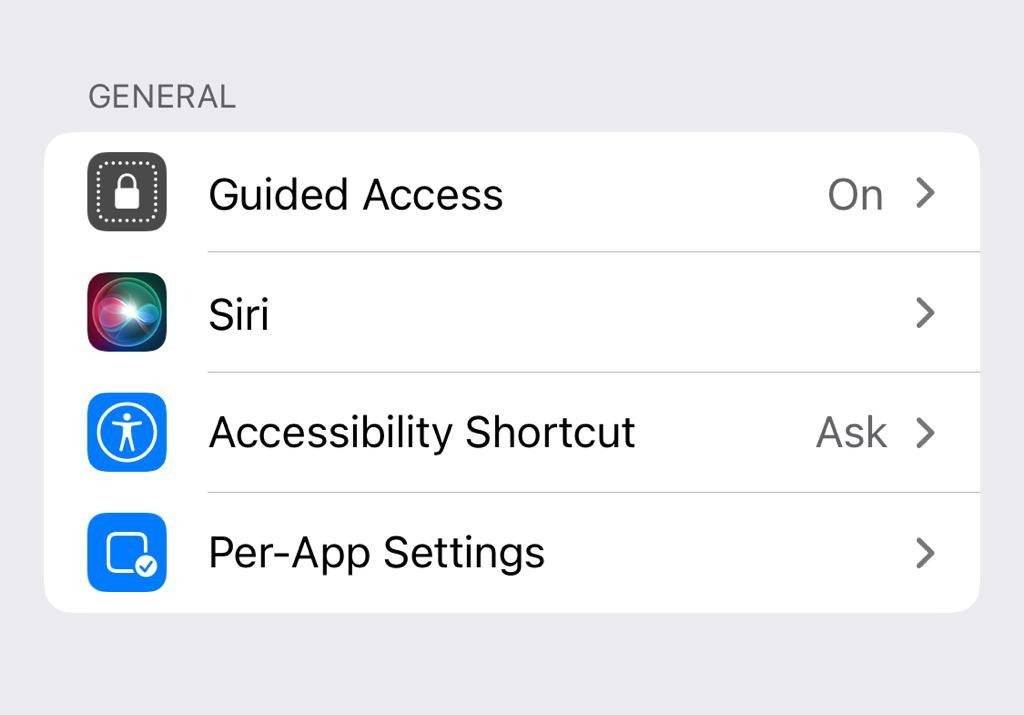
- Scroll down again and tap Accessibility Shortcut.
- Tap on Smart Invert Colors and then select Back.
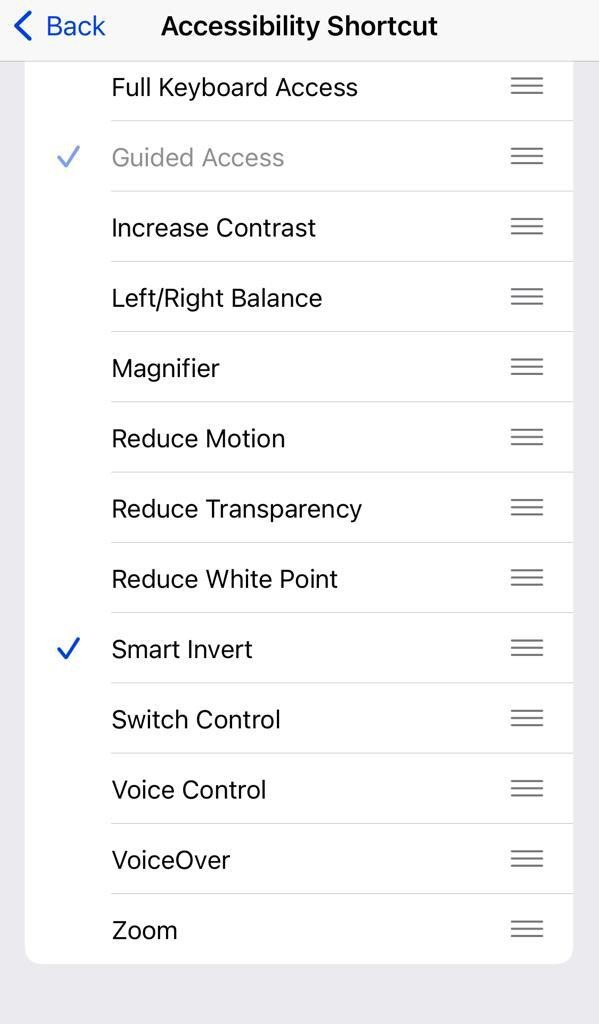
- Now, whenever you triple-click the Home button, the colors on your screen will invert. To revert back to the standard display, triple-click the Home button again.
So, these were the methods through which you can invert colors on your iPhone 13 display. That will help you to control the inverted picture options from your iPhone shortcut options. You can easily do this task by following the above-mentioned methods.
Conclusion:
In this article, we have shown you how to invert a picture on iPhone. We have also provided a step-by-step guide on how to use the built-in setting and a third-party app to switch images. Give it a try today and change up the look of your photos. There are several ways to modify an image using your iPhone. We’ve gone through and explained the procedure in depth. The solutions above will help you invert colors on a picture stored on your iPhone, whether for looks or because of visual impairment.